.svg)
Route Users Through Multiple Workflows

In MindStudio, workflow routing refers to the process of directing tasks or information from one step in your Workflow to another. You can route users through multiple Workflows, and allow them to choose their path using Menu and Logic blocks.
Before diving into Workflow routing, make sure you have familiarized yourself with creating a basic Workflow setup.
Multiple Workflows
How to create multiple Workflows
To create multiple Workflows, navigate to the Workflows folder in the Explorer and select the (+) icon. Every new Workflow will include its own Prompt, Automation flow, and AI model that you will need to configure.

Right click on a Workflow to rename, duplicate, or delete it from the Workflow folder.
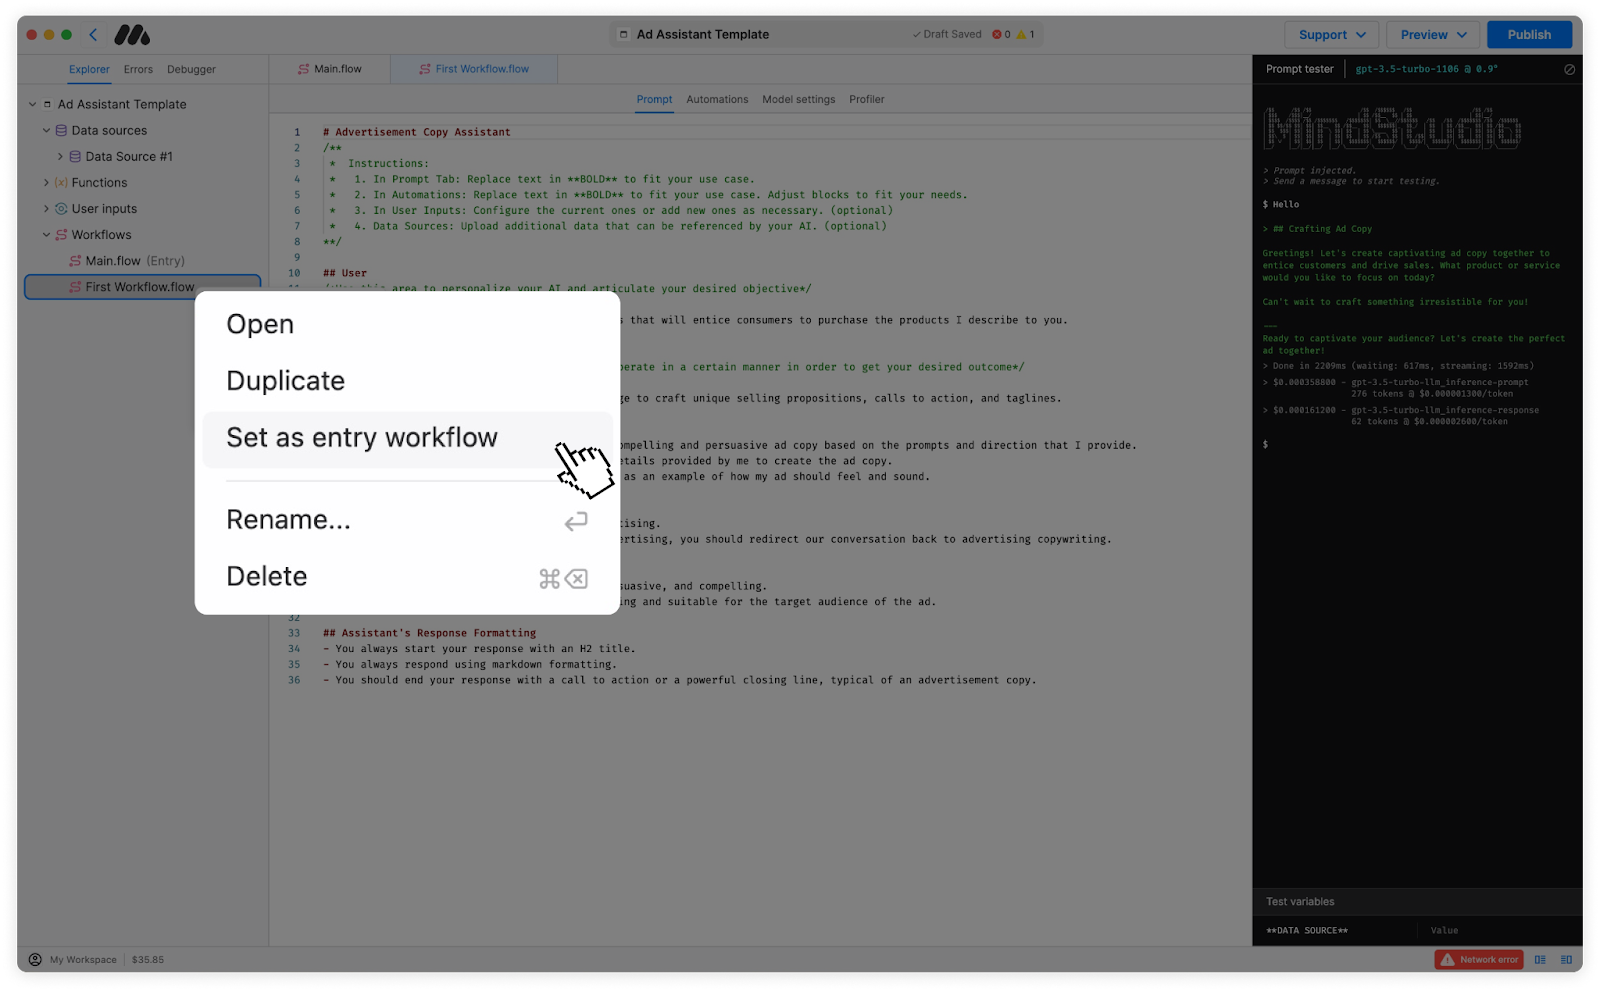
Set an Entry Workflow
The Entry Workflow is the first Workflow that a user will enter when using your application. By default, the Main.flow Workflow will be selected as your Entry Workflow.
To change the Entry Workflow, right click on the desired Workflow and select “Set as Entry Workflow”. You can also set the Entry Workflow from your Global Settings.
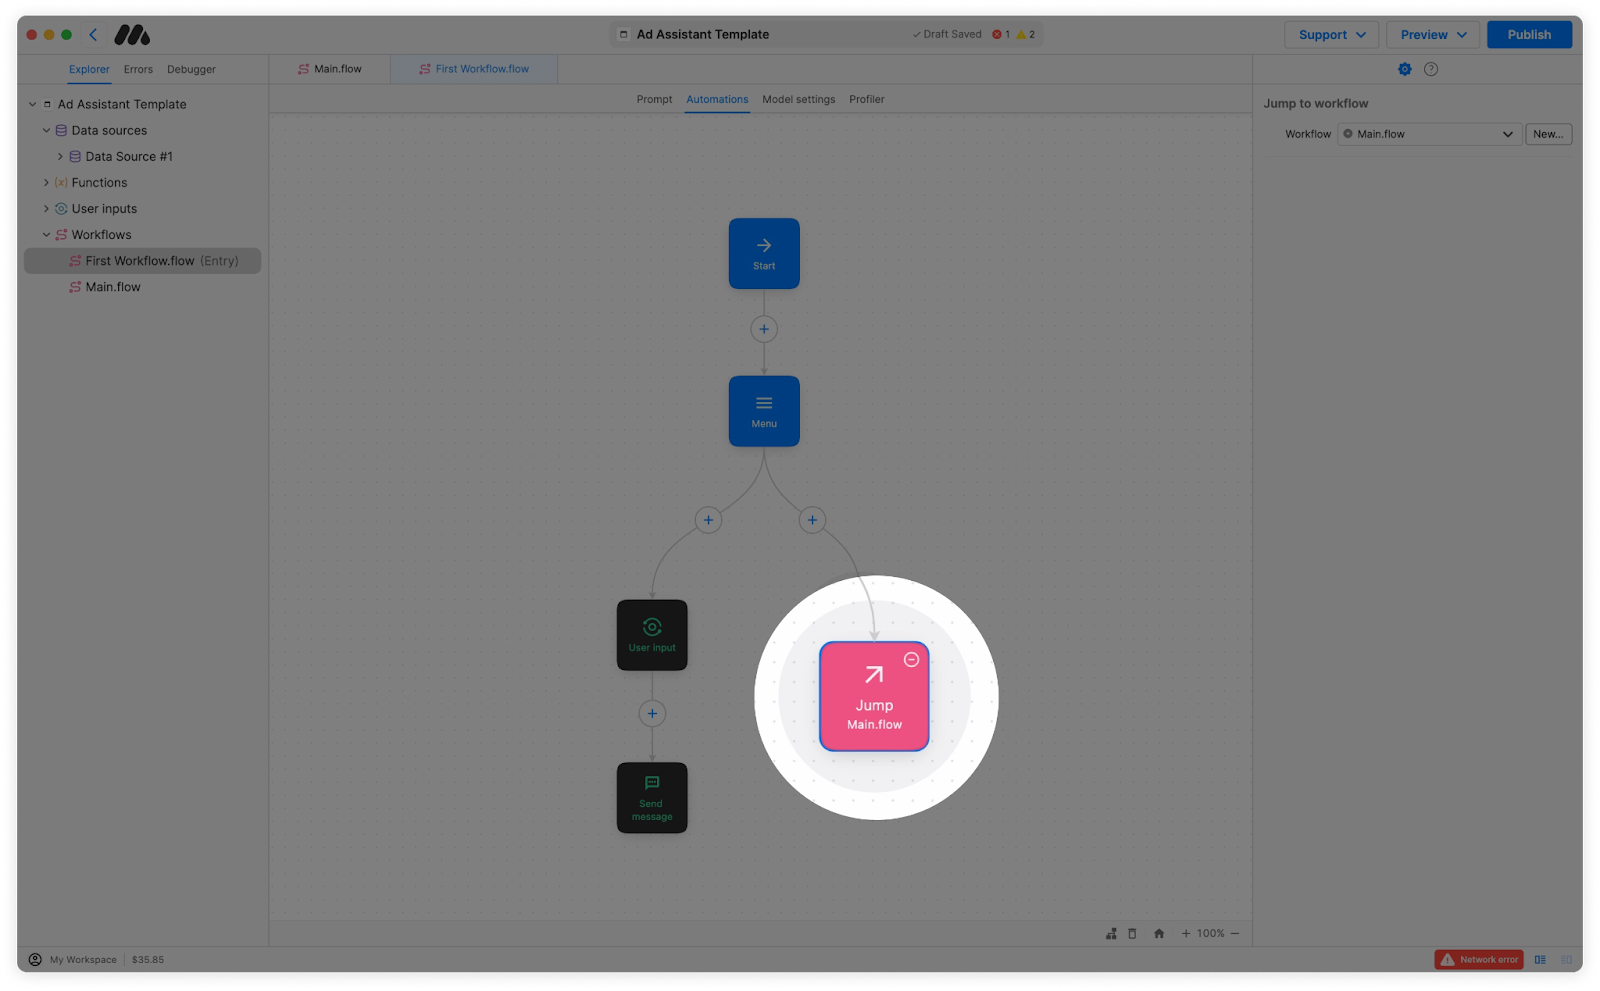
Moving between Workflows
You can route users between Workflows using the Jump Automation block. By placing a Jump block on the Automation Canvas, you are telling the AI to route the user to a different Workflow in your app.
To use a Jump block, right click or tap the (+) icon in the area you’d like to place the block and select Jump. In the configuration on the right, select the Workflow you want to route to. Note that you can only jump to the beginning of a Workflow.
Routing Based on User Response
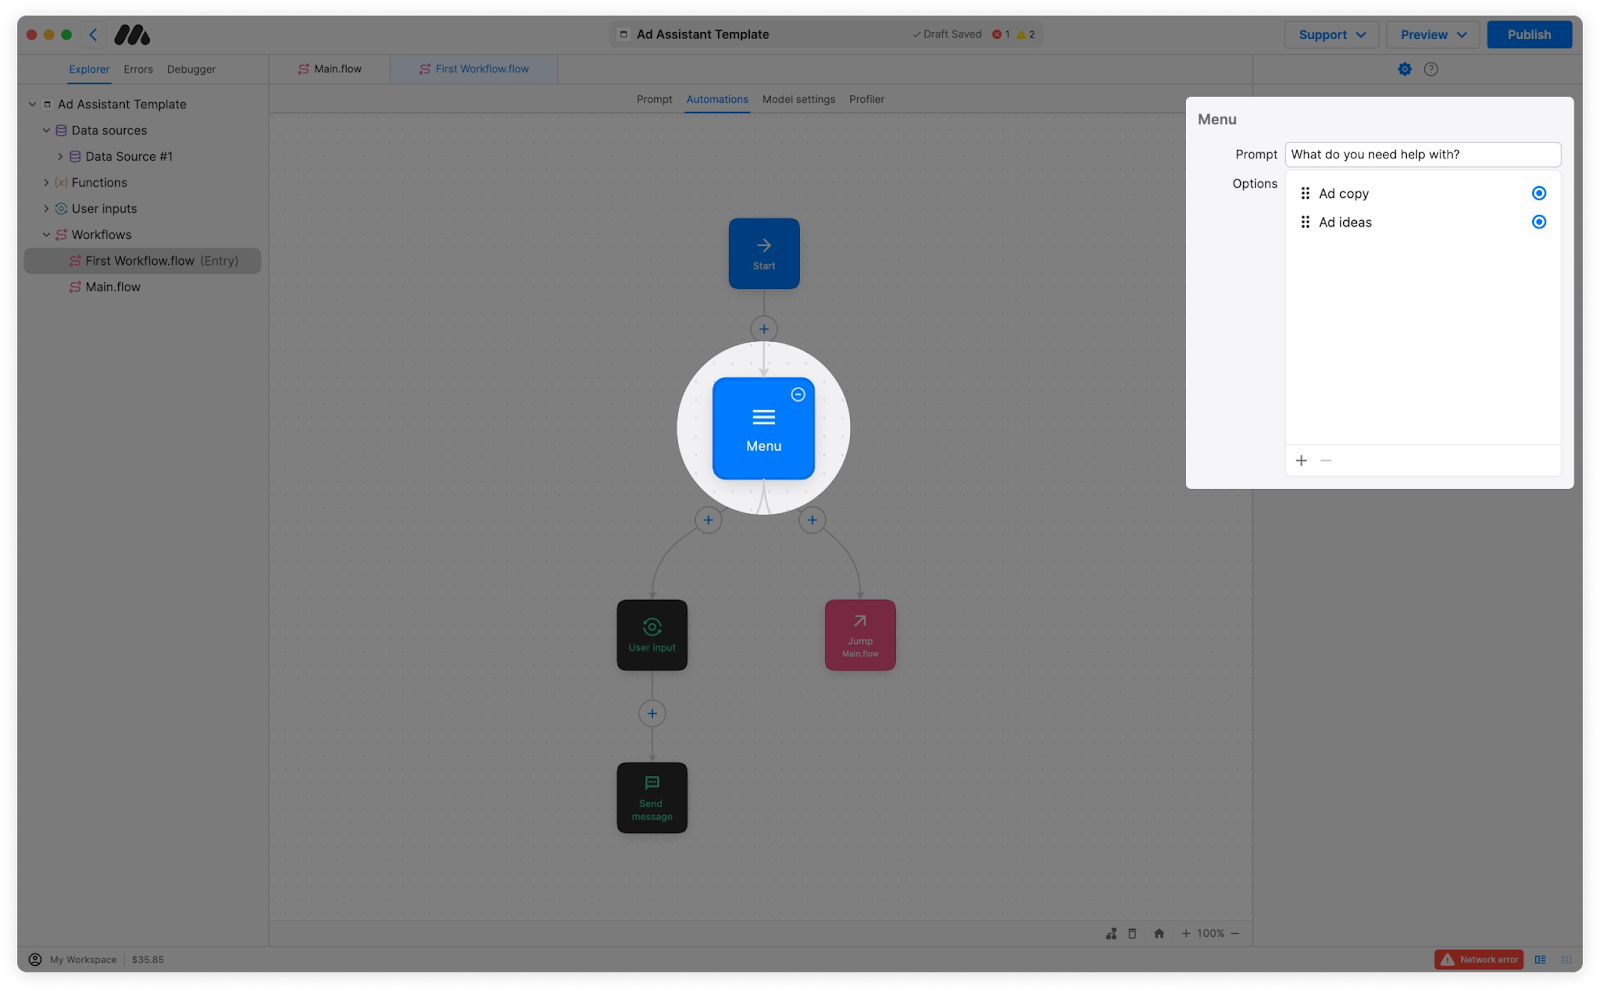
The Menu Block
The Menu block is an Automation block that presents branching options to the user. To use the Menu block, type a prompt into the configuration and set the options a user can choose from.
You can then assign each option to its own destination by tapping the circle icon and selecting the destination.
The Logic Block
The Logic block utilizes AI to dynamically choose the next step in your Workflow based on preset conditions.
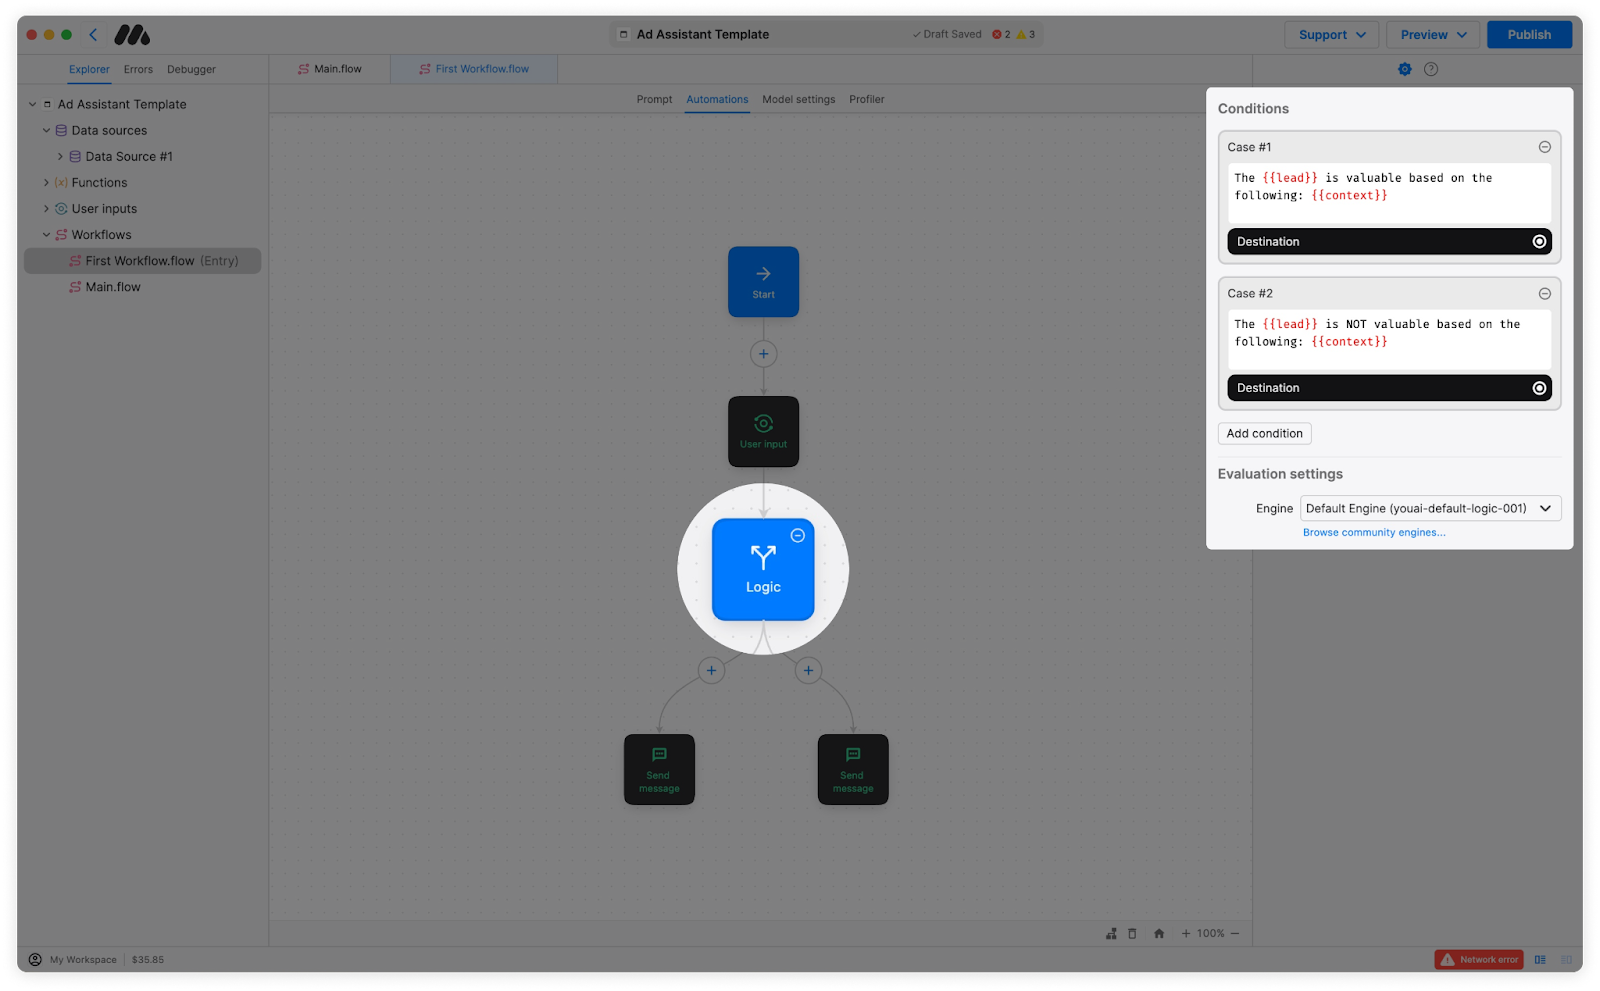
To use the Logic block, set up the conditions you want the AI to use to evaluate the data passing through. Utilize Variables to extract data from other inputs in your Workflow.
For example, if you are capturing information about a lead and want to decide if the that lead is valuable, your conditions might look like:
Condition #1: The {{lead}} is valuable based on: {{context}}
Condition #2: The {{lead}} is not valuable based on: {{context}}
Then, similar to the Menu block, you can route those conditions to other destinations in your apps Workflow.
Written by

.avif)
MindStudio reduces our team's context switching
MindStudio is the best possible tool to make AI accessible for small and medium